I always find random bobby pins or thumb tacks scattered on my desk that need a home, so I thought no better way to provide them that place to crash than to make a DIY knick-knack dish! This craft cost me less than $10 and took me under an hour to make. What better way to spend a Saturday morning?
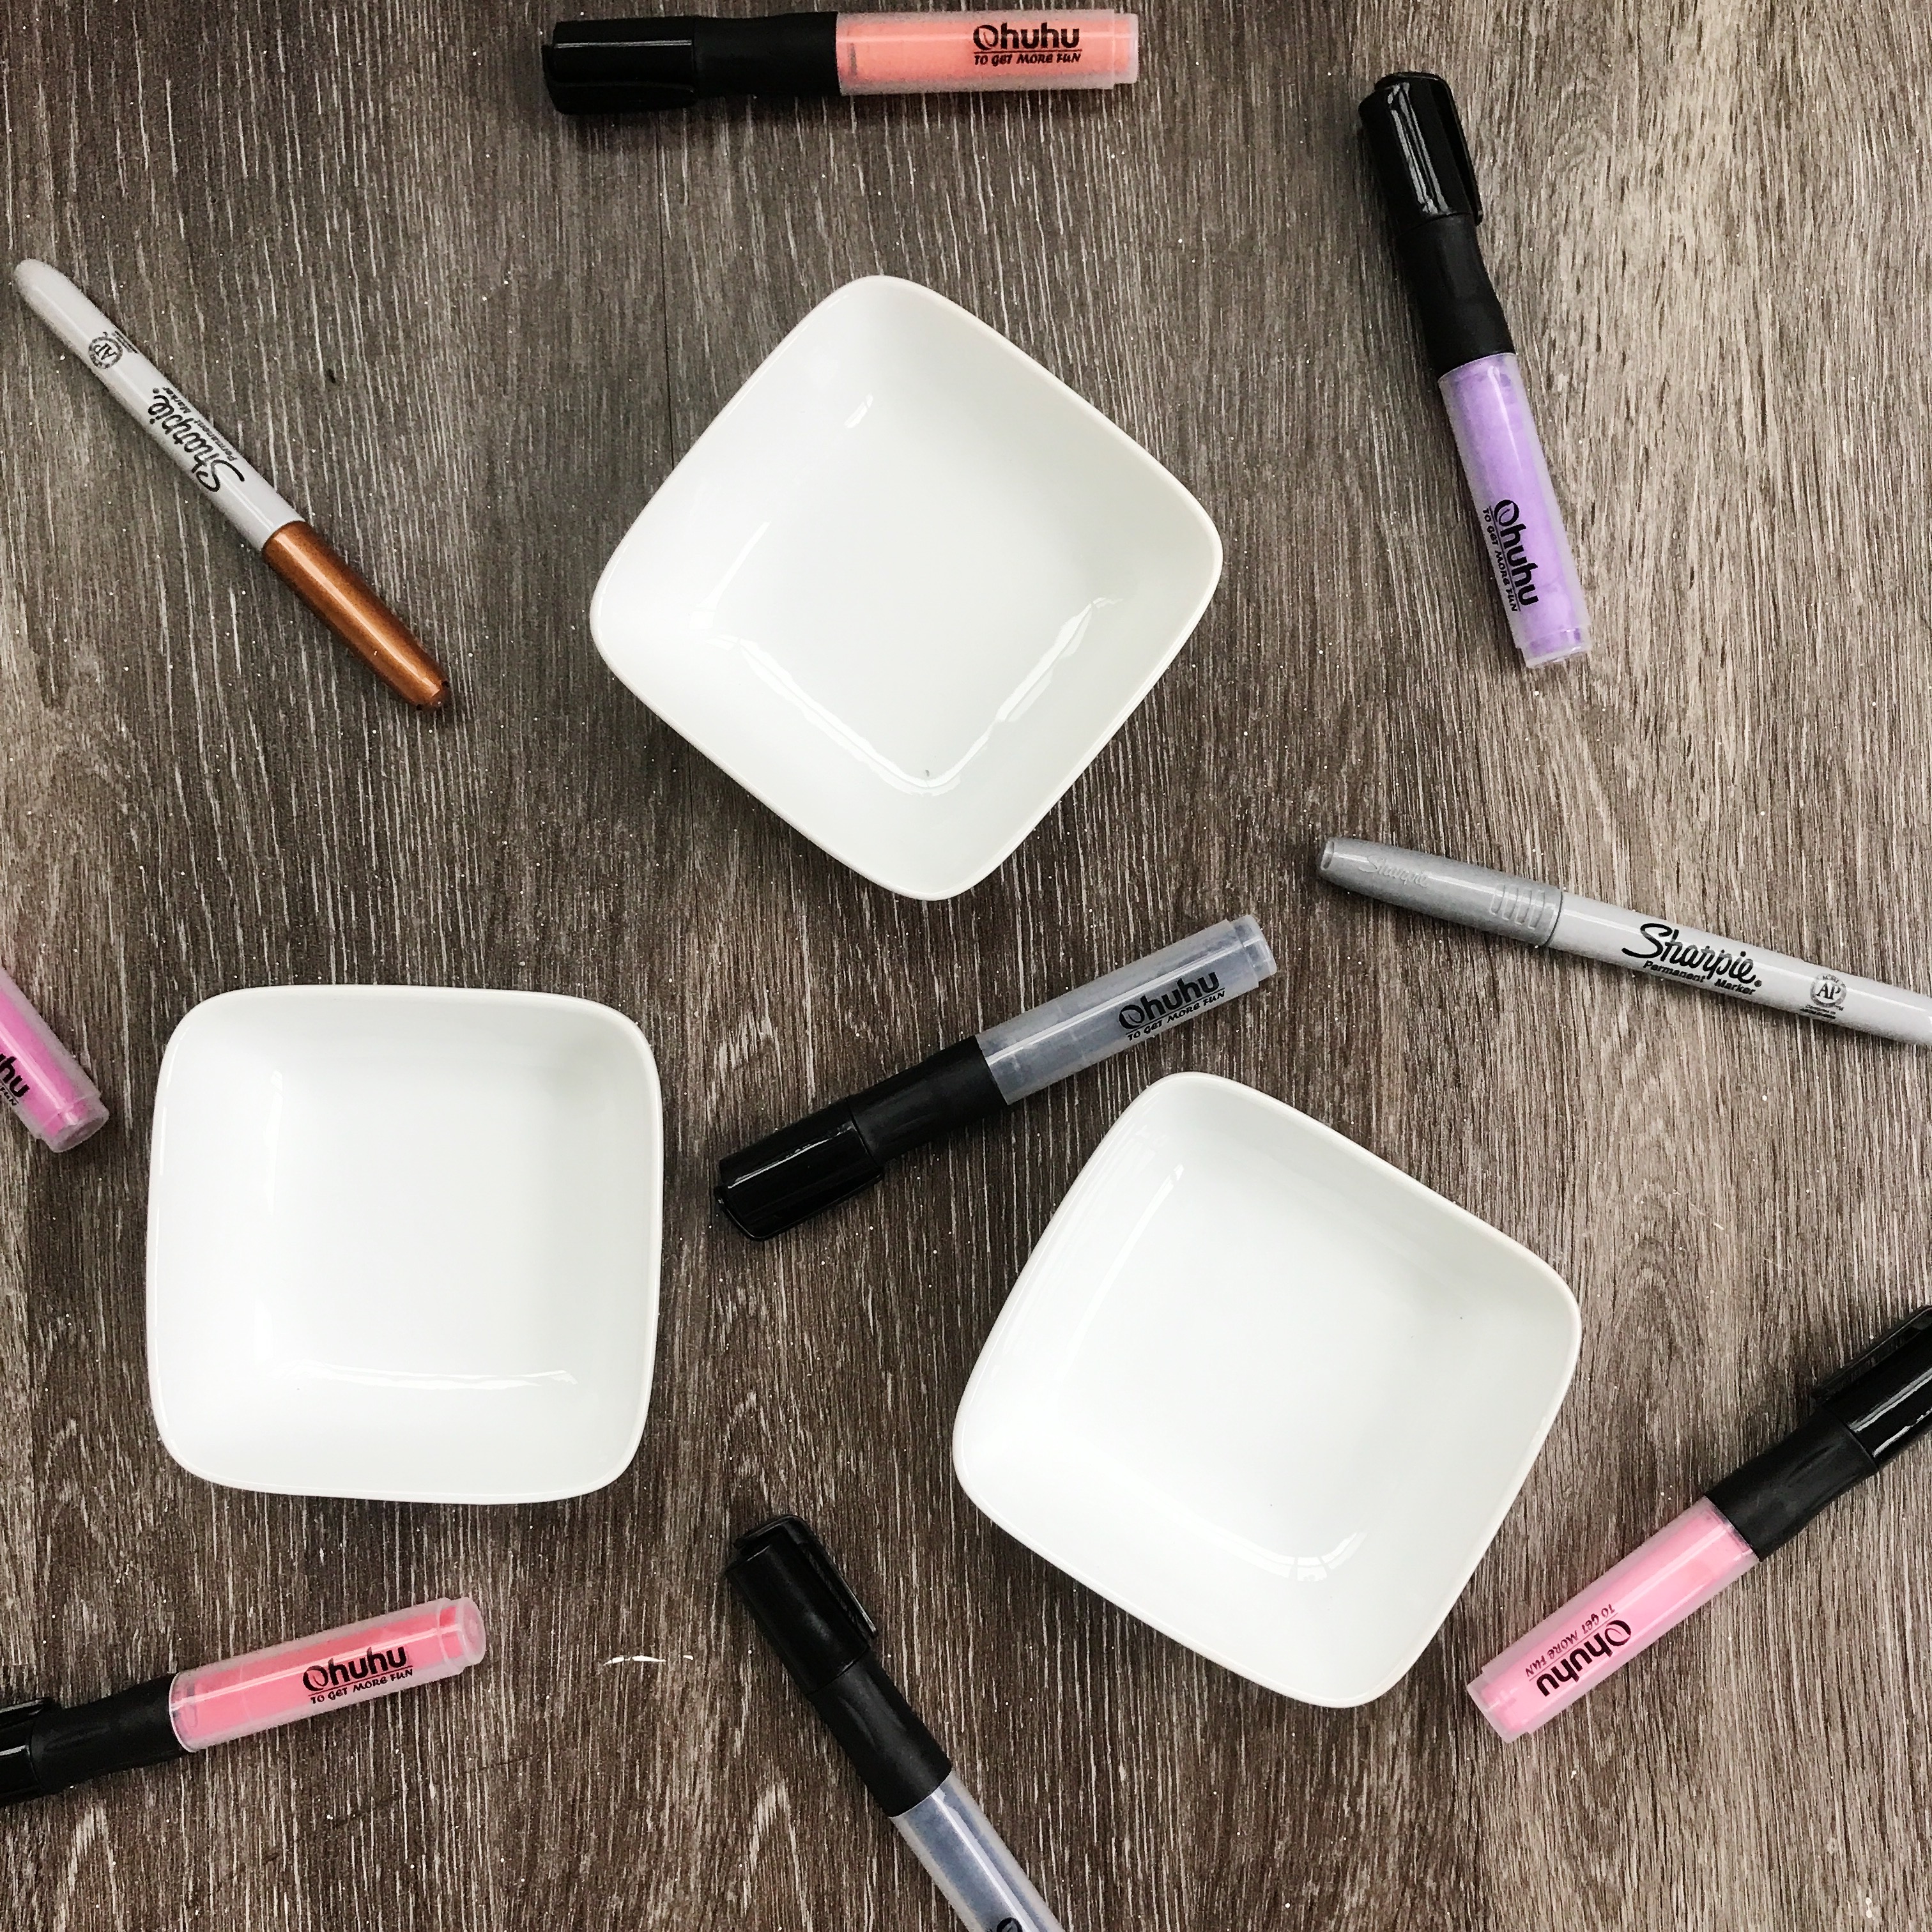
Materials
White Porcelain Dishes (I got mine from Target for $2 a piece)
Acrylic Paint Markers (Optional)
Sharpies (Any color)
Saran Wrap (Optional)
Oven
Step One
Make sure your dishes are clean before you start any design. Nothing ruins a good project like dog hair and dust! After you’ve cleaned your dishes, preheat the oven to 300º.
Step Two
Start designing! It’s seriously that easy.
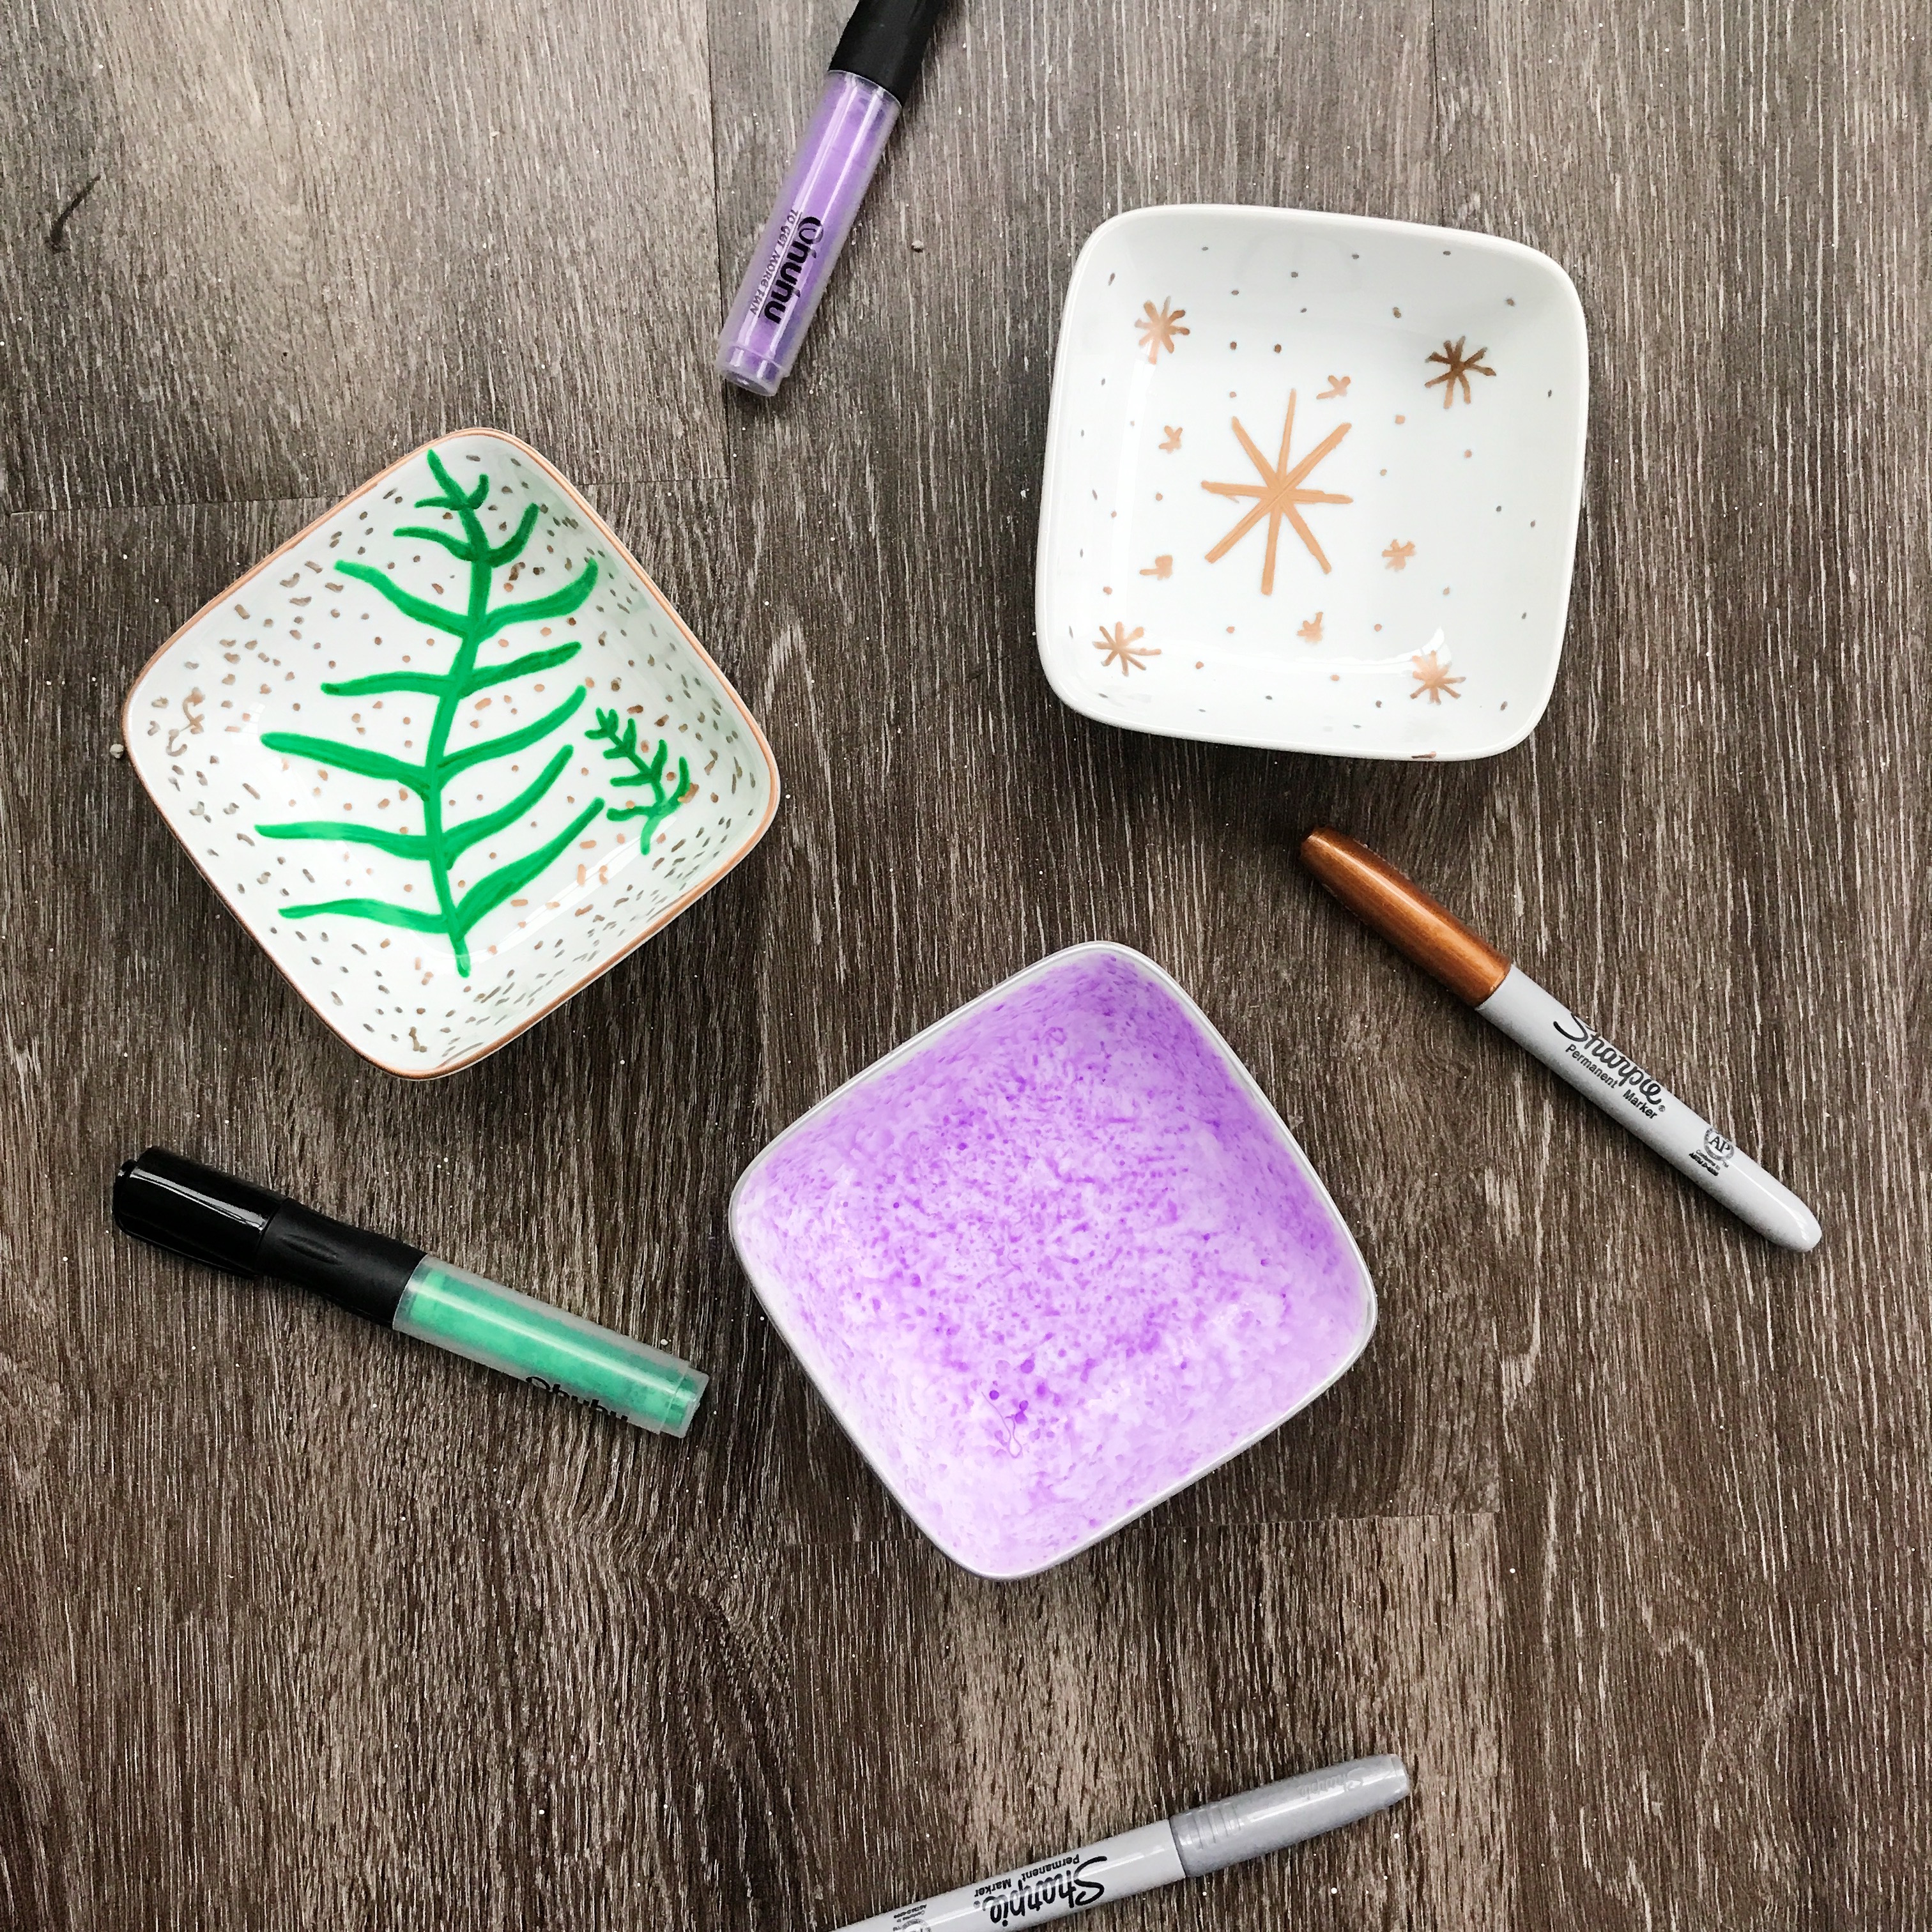
For my first dish, I used a purple acrylic marker and colored all over the base of the bowl. I added some water to dilute the pigmentation, and then, took a piece of saran wrap and dabbed it around the bowl to create some texture. I finished the design off with a silver rim created with a Sharpie. Check out the video of how I made it below!
For my second dish, I free-handed a leaf design and embellished the drawing with a bronze rim and dots.
For my final dish, I kept it super simple with an asymmetrical star design and dots.
Step Three
Pop the finished dishes in the oven for 30-40 minutes to seal the design, and you’re done! Hand wash dishes.
It’s seriously that easy! These dishes are perfect to sit on your bathroom counter to plop some earrings in or place on your desk to toss spare change into. You can keep them for yourself or give them away as personalized gifts. The options are endless! Also, as you can tell, these definitely don’t have to be perfect. I am no artist by any means, but I like to have fun with crafts like this. My brother’s girlfriend gave me the acrylic paint markers as a gift, but Sharpies are an easily accessible crafting supply and work perfectly as a substitute.
Bonus: If you mess up, you can easily erase the design and start over by washing the dish with a sponge and some soap!
Let me know what designs you decide to do on your own knick-knack dishes in the comments below!
Happy crafting,
Kimberly

38 Comments
descargar facebook
Hello, after reading this amazing piece of writing i am as well glad to share my knowledge here with colleagues.
refund
Your article is really useful to me, thank you very much.
civil war games for pc
vietcaca
Your article is very useful, thanks
free online addicting games for adults
descargar facebook
I always emailed this blog post page to all my friends, for the
reason that if like to read it then my links will too.
What Equipment is Needed for Sling TV
Superb post however , I was wanting to know if you could write
a litte more on this topic? I’d be very grateful if
you could elaborate a little bit more. Cheers!
What Equipment is Needed for Sling TV
My developer is trying to persuade me to move to .net from PHP.
I have always disliked the idea because of the costs. But
he’s tryiong none the less. I’ve been using WordPress on various websites for about a
year and am worried about switching to another platform.
I have heard good things about blogengine.net.
Is there a way I can import all my wordpress content into it?
Any help would be really appreciated!
What Equipment is Needed for Sling TV
Great info. Lucky me I recently found your blog by chance
(stumbleupon). I’ve saved as a favorite for later!
What Equipment is Needed for Sling TV
I am sure this paragraph has touched all the internet viewers, its really really fastidious paragraph on building up new web
site.
sling tv coupons and promo codes for november 2018
Sling tv coupons and promo codes for november 2018
WOW just what I was looking for. Came here by searching for sling tv coupons and promo codes for november 2018 sling tv
coupons and promo codes for november 2018
Sling TV
Hi, I do think this is an excellent website. I stumbledupon it 😉 I will come back once again since
I book marked it. Money and freedom is the best way to
change, may you be rich and continue to help other people.
What Equipment is Needed for Sling TV
What’s up, everything is going sound here and ofcourse every one is sharing facts, that’s really fine, keep up writing.
What Equipment is Needed for Sling TV
Hello there! This post could not be written much better! Reading through this article reminds me of
my previous roommate! He constantly kept talking about this.
I am going to send this article to him. Pretty sure he’ll have a very good read.
Thank you for sharing!
Sling TV
What’s up every one, here every person is sharing these familiarity,
thus it’s fastidious to read this web site, and I used to visit this
web site every day.
Sling TV
Woah! I’m really digging the template/theme of this blog.
It’s simple, yet effective. A lot of times it’s hard to get that “perfect balance” between superb usability and appearance.
I must say you’ve done a very good job with this.
Also, the blog loads extremely quick for me on Chrome.
Exceptional Blog!
What Equipment is Needed for Sling TV
I am really impressed with your writing
skills as well as with the layout on your weblog.
Is this a paid theme or did you customize it yourself?
Either way keep up the nice quality writing, it is rare to see a nice blog like this one nowadays.
Quest Bars Cheap
Marvelous, what a webpage it is! This web site presents helpful facts to us, keep
it up.
Quest Bars Cheap
hello!,I like your writing so a lot! proportion we keep in touch extra approximately your article
on AOL? I require an expert in this space to solve my problem.
May be that is you! Having a look ahead to look you.
quest bars cheap
Hello there I am so happy I found your site, I really
found you by error, while I was looking on Bing for something
else, Anyways I am here now and would just like to say thanks
for a tremendous post and a all round entertaining blog (I also love the
theme/design), I don’t have time to read through it all at the moment
but I have book-marked it and also added in your RSS feeds, so when I
have time I will be back to read much more, Please do keep up the awesome b.
descargar facebook
Thanks for ones marvelous posting! I actually
enjoyed reading it, you’re a great author.I will make certain to bookmark your blog and definitely will come back someday.
I want to encourage you to definitely continue your great job, have a nice
day!
Coconut Oil
Thank you for the good writeup. It if truth be told was
a enjoyment account it. Look complicated to more introduced
agreeable from you! By the way, how could we keep
up a correspondence?
Benefits of Coconut Oil
This is a topic that is near to my heart… Thank you!
Exactly where are your contact details though?
Coconut Oil Benefits
Everything is very open with a precise clarification of the challenges.
It was definitely informative. Your website is very helpful.
Many thanks for sharing!
Coconut Oil
I am regular visitor, how are you everybody? This paragraph posted at this web site is actually fastidious.
Coconut Oil Benefits
Hello colleagues, nice post and nice arguments commented at this place, I am actually enjoying by
these.
Benefits of Coconut Oil
I do not even know how I ended up here, but I thought this post was great.
I do not know who you are but certainly you’re going to a famous blogger if you are not already
😉 Cheers!
minecraft free download 2018
Fantastic beat ! I wish to apprentice while you amend your site, how could
i subscribe for a blog website? The account aided me a acceptable deal.
I had been tiny bit acquainted of this your broadcast provided bright clear concept
ปั้มไลค์
Perfectly composed articles , thankyou for information. 🙂
minecraft free download 2018
Hi! I know this is somewhat off topic but I was wondering which
blog platform are you using for this website?
I’m getting sick and tired of WordPress because I’ve had problems with hackers and
I’m looking at options for another platform. I
would be awesome if you could point me in the direction of a good platform.
minecraft free download 2018
Nice weblog right here! Also your website a lot up fast!
What web host are you the usage of? Can I get your associate hyperlink to your host?
I want my website loaded up as quickly as yours lol
minecraft
Magnificent beat ! I would like to apprentice while you amend your site, how can i subscribe for a blog web site?
The account aided me a acceptable deal. I had been tiny bit acquainted of this
your broadcast offered bright clear idea
minecraft
Every weekend i used to go to see this web site, as i want enjoyment,
since this this web site conations genuinely nice funny data too.
minecraft
Howdy! Would you mind if I share your blog with my facebook group?
There’s a lot of folks that I think would really appreciate your content.
Please let me know. Thank you
minecraft
You’re so interesting! I don’t suppose I’ve read a single thing like that before.
So nice to find another person with a few genuine thoughts
on this topic. Really.. thanks for starting
this up. This site is something that is required on the internet,
someone with a little originality!
minecraft
What’s up it’s me, I am also visiting this web site daily, this site is genuinely pleasant and the users are really sharing fastidious thoughts.
minecraft
We’re a gaggle of volunteers and opening a new scheme in our community.
Your web site offered us with helpful info to work on. You have performed a formidable
task and our entire community will be thankful to you.
เพิ่มยอดไลค์
It is in reality a great and useful piece of info. Thanks for sharing. 🙂
Like
Like!! Really appreciate you sharing this blog post.Really thank you! Keep writing.
Becky (Blogs of a Bookaholic)
This is such an awesome and simple little craft idea, I love it! Can’t wait to try.